Hello! I've been playing with Spellbinders new Stained Glass dies and found them to be really fun to create with! I have two cards to share with you today and I think they are both so happy and cheerful.
 Inlay Stained Glass Die Cutting
I started by ink blending three panels for my stained glass in-lay:
- a coral gradient of soft pink, hot pink and orange
- two greens
- aqua blue
I let the panels dry and then began die-cutting.
- I used the square die to cut a 4 1/4" square while at the same time using the circle die to cut an opening in the center. I stamped my sentiment near the bottom.
- Using a tape runner, I adhered craft foam to the back of the square panel with the circle cut.
- I folded a fabric softener sheet into fourths and then placed on top of the circle die cut so the small pieces would not stick to the die.
- I then die cut the circle from black and then again from the three ink blended panels.
- I carefully put the black frame in the circle and then added the aqua, pink and green inlay pieces. The tape runner adhessive was there to secure all the inlay pieces.
- I made a 4 3/4" x 4 3/4" square card and then attached my stain glass panel.
I like that the pink/coral gradient gives subtly different tulip colors.
Supplies:
- Spellbinders Tulip Trio Stained Glass Bouquet Etched Dies
- Hand inked panels
- Black Cardstock
- Craft Foam
- Tape Runner
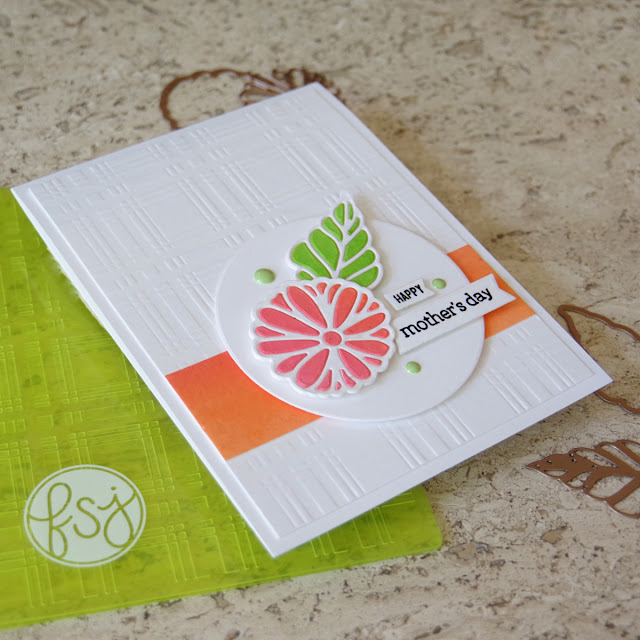
I decided to make a second card using the remaining inkblended panels from card #1.
- I die cut the flower and leaf skeleton in white and then cut each base from white. I glued the skeleton to the base with a tape runner again.
- I then cut the flower from the coral panel and the leaves from the green panel. With the colored pieces still in the die, I flipped the die over and guided the pieces into the corresponding cavities. This actually works really well for the small pieces.
- I dry embossed the plaid background.
- The accent strip was cut from the coral ink blended panel and then glued to the embossed panel.
- I used the circle die from the first kit for a spotlight circle and then attached the elements with foam tape.
 Supplies:
 - Spellbinders Be Leave Me Stained Glass Bouquet Dies
- Spellbinders Plaid Embossing Folder
- Spellbinders Tulip Trio Stained Glass Bouquest Etched Dies (diecut circle spotlight)
- Hand Inked Panels for Inlay
- Craft Foam
- Tape Runner
- Enamel Dots
I love the clean bright white and warm summery colors on this card. I would love to hear which card you like best.
Karen


No comments:
Post a Comment
Thank you so much for stopping by! I enjoy reading all the comments.