Showing posts with label Distress Ink. Show all posts

Wednesday, October 21, 2020

WWC294 - Marsha's Challenge: Anything Goes With a Masculine Twist


Hello, hello and welcome!  This week we are creating masculine cards at Watercooler Wednesday.  I've made a fun mixed media card using Altenew's Mega T Aphabet die and thanks die.

My Process:
  • I started with a 140 lb weight watercolor panel and then die cut the T. 
  • With a wide rough brush (I used a house painting trim brush) I applied a layer of gesso and then dried. 
  • Using a Carved Pumpkin mini distress ink cube I dabbed orange on the panel in random locations.  
  • I sprayed Iridescent Shimmer Spray to the panel which moved the distress ink around a bit and then dried with a heat tool.
  • I added another layer of randomly dabbed Carved Pumpkin Distress Ink which I again activated with the shimmer spray and then dried.
  • I then mixed gesso with Mermaid Lagoon distress ink and applied with a strip of cardstock for a rustic feel.  I then tinted the gesso a bit darker with the same distress ink and applied a bit more with the cardstock strip.  This way I have two shades of aqua on the card which I think gives added interest. Dry.
  • I dabbed a bit of Versamark ink on the panel, sprinkled on gold embossing powder and rubbed off most of it so that there were just touches of gold on the panel.  I heat set.
  • I die cut the thanks die from turquoise card stock.
  • I added the T panel to a cream colored A2 cardbase and glued on the sentiment.
This thank you card was so fun to make! There is a gorgeous shimmery sheen that does not photograph well, but the card just glows in person.

I am also playing along with:


Simon Says Stamp "Layer It Up"  I used 7 layers of gesso, distress ink, shimmer spray, embossing powder plus two die cut layers.  

I am so glad that you stopped by!
Karen 

Wednesday, October 14, 2020

WWC293 - Tristan's Challenge: All About Occasions

Happy Fall Y'all...that's what we say here in Texas.  I have the Jane's Doodles Pumpkin Spice stamp set and thought it would be fun to fussy cut three of the pumpkin images and mount them on masked inked squares. This card is up on the Watercooler Wednesday Challenge Website and we would love to see your creation in our gallery.

Supplies Used
Jane's Doodles Pumpkin Spice stamp set
Taylored Expressions Square Windows Masking Stencil
Distress Ink (mustard seed, carved pumpkin and mowed lawn)

I am also playing along with:

Tic Tac Toe #085  I selected left row down:  Pumpkins, Orange, Fall


UPDATE:  My card was selected as a "Team Favorite" at Tic Tac Toe

I am so pleased you stopped by!

Karen

Wednesday, September 30, 2020

WWC291 - Fifth Week Anything Goes Challenge

Summer technically just ended but I have one more card with the summery colors I love.  I had a scrap of striped background left from a card I made a few weeks ago that was too pretty to throw away so I made it into a card for Watercooler Wednesday's Anything Goes Challenge.  I think bright and happy always works for birthdays.  The background uses the same colors as the striped panel.


Here is a link if you would like to see the original card I made with the watercolor panel.

I am also playing along at:

Supplies Used:
Jillibean Soup Enjoy sentiment
Distress Inks

UPDATE:  I was so pleased to see my card recognized as a Top Pick at Make My Monday Use Your Scraps!

Thanks for stopping by!
Karen


Thursday, August 6, 2020

Altenew Academy - Impressive Heat Embossing

Hello!  I just completed another course at Altenew Academy called Impressive Heat Embossing.  So many great cardmaking techniques from Svetlana Marchenko!

This card is from lesson #3, Heat Embossing for Resist.
I love to ink-blend so I chose to ink blend over my embossing.  For ink blending it is best to start with light colors and then add the darker tones.  I started with my palest yellow, then added sunshine yellow and finished up with orange highlights.  For the stem I used two shades of green.  I die-cut my "thanks" from aqua paper and I like the big showy sentiment.  I love how bright and cheery this card turned out.
Altenew Supplies:
Altenew Inked Lotus
Altenew Thanks die

I am so pleased that you stopped by!
Karen


Wednesday, June 17, 2020

WWC276 - Marsha's Challenge: Anything Goes with a Masculine Twist

Hello and welcome.  Today we are making masculine cards at The Watercooler Wednesday Challenge and Marsha is our hostess.  I like the look of grunge/mixed media cards but I've never made one myself.  I decided to give it a try with this dragonfly.
My Process:
  • I started by inking my glass media mat with various shades distress ink.  I sprayed with water and then laid a sheet of watercolor paper on the ink/water.  I dried with a heat tool and repeated this process a couple of times.
  • After the panel was dry I stenciled and stamped random elements on the panel
  • I then heat embossed the dragonfly and sentiment.
Supply List:
Visible Images "Live In the Moment" dragonfly stamp
Visible Images circle stamps
SSS Sketchy Lines background stamp
Tim Holtz Brick Layering Stencil
Ancient rubber stamp numbers
Stamps of Life sentiment
Nuvo Hot Chocolate Embossing Powder
Various colors of Distress Ink
Watercolor paper

I am playing along with:


This is a fun technique that I want to do again in the future.

I am so pleased that you stopped by!
Karen

Sunday, May 31, 2020

Altenew Academy - Let It Shine

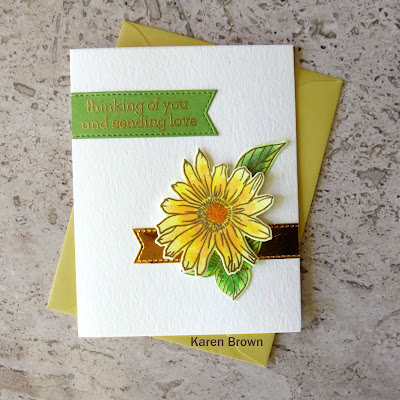
I finished Altenew Academy's Let It Shine Class and wanted to share this card on my blog.  As the name suggests, our teacher Clarissa Wiley, taught us to embellish our cards with a bit of shine. I am happy with the way this card turned out....but boy did I put in a lot of work.  I had a different layout created in my mind, but when I laid out the design there was  too much metallic gold.  I kept diecutting flags, banners and sentiments strips. Originally there was a lot more metallic gold cardstock but I decided for me, less is more...a little gold goes a long way!    I will save the other elements I created for future cards and it will be nice to have them all ready to go.
Altenew Academy Let It Shine card featuring gold embossing and gold metallic card stock accent.
My inspiration was to use metallic cardstock (lesson #5), gold embossing (lesson #2) and faux watercoloring over ink blending that I learned in Altenew Academy's Easy Ink Blending Class.  Another example of this fun technique is here.
My Process:
I started by heat embossing this beautiful daisy in gold and then I lightly inkblended a pale yellow over the bloom.  Next I gently sprayed the flower with water and then used a #8 brush and distress inks to paint on some darker yellow highlights using  wet on wet watercoloring.  I dried with a heat gun and then added random orange highlights using wet on dry watercoloring.  I repeated the same technique with the leaves.  I assembled the card using liquid glue and foam adhessive to raise up the flower bloom.
Supplies:
Altenew Smile More stamps and dies
Distress Inks
Watercolor Paper
Picket Fence Studios Life Changing Blending Brush
#8 Paint Brush
Gold Embossing Powder and Versafine Ink
Metallic Gold Cardstock
Scrap of green cardstock for sentiment
Liquid Glue
Foam Adhesive Tape
A2 cream colored card 

As I said above, I tried a lot of  layouts and decided in this instance, CAS was best for me.

I am also playing along at:  

The Sisterhood of Crafters Favorite Technique Challenge.  I recently learned how to faux watercolor and I am having so much fun with this new to me technique!

Global Design Project - Floral Challenge I am happy to add my flower to the GDP challenge.  


I am so pleased that you stopped by!
Karen

Wednesday, January 29, 2020

WWC256 - Kath's Challenge: All About Occasions

Hello and welcome.  This week is all about "Occasion" cards at The Watercooler Wednesday Challenge and Kath is our hostess.  

I started by making an "ink-smoosh" panel.  Here was my technique:

  1. I liberally inked an 6x6" acrylic block with Distress Inks.  I wanted an ombre gradient look so went in rows across the page.  I used Mermaid Lagoon, Salty Ocean and Twisted Citron.  
  2.  I liberally sprayed the inked block with water 
  3. "Smooshed" the block onto a piece of watercolor paper
  4. Weighted the ink/block with a book for 5-6 minutes
  5. Uncovered.  If the ink pooled, I dabbed with a paper towel.
The next day, after the panel was dry, I die cut the B using the Altenew Mega Alphabet "B" die.  I heat embossed the birthday sentiment and die cut a cover frame using Sunny Studio "Frilly Frame Stripe".  I glued the striped frame, B and sentiment to an A2 card.  I like the clean simple lines of this card.

I am entering this card in Simon Says Stamp's Anything Goes Challenge

I am so pleased you stopped by!
Karen
Image may contain: text

Wednesday, January 8, 2020

WWC253 - Karen's Challenge: Anything Goes With A Feminine Twist

Hello and welcome!  I can't believe it is a new year...and a new decade.  This week we are making "feminine" cards at The Watercooler Wednesday Challenge Website and I am the hostess.

I ordered some Altenew Mega Alphabet dies and the Altenew Large Thanks sentiment so I could make some thank you cards.  I wanted a bright happy card so I decided to do some "ink smooshing". 

 I started by making two inked panels.  Here was my technique:
  1. I liberally inked an 6x6" acrylic block with Distress Inks.  I wanted an ombre gradient look so went in rows across the page.
  2.  I sprayed the inked block with water 
  3. "Smooshed" the block onto a piece of watercolor paper
  4. Weighted the ink/block with a book for 5 minutes
  5. Uncovered.  If the ink pooled, I dabbed with a paper towel.
  6. I made a "second generation" panel for the background by taking a piece of Bristol Cardstock and soaking up the excess ink on my work space.    I had never done this before but I like having a softer but coordinated background for my card.  
Panel one was made with Peacock Feathers, Cracked Pistachio, Twisted Citron and Mustard Seed.  

Panel two (thanks) was Abandoned Coral, Carved Pumpkin and Mustard Seed.

After the panels were dry, I die cut the "T", thanks and floral images (Spellbinder's Month 7 Die of the Month and Newton's Nook Flower Trio die). I also die cut Sunny Studio's Frilly Frame to go over my second generation background.  I used Gina K Connect glue to adhere everything to the A2 card.    

I am pleased with this bright vibrant card.  

I am entering this card in:
As You Like It Thanks Challenge

Dies R Us Challenge I used Spellbinders floral dies.

Always Fun Something New Challenge  I made a second generation ink smooshing panel to coordinate with my die cuts.  I had never thought to coordinate like this in the past.  

Alphabet Challenge Try Something New I made a second generation ink smooshing panel to coordinate with my die cuts. I had never thought to coordinate like this in the past. 

UPDATE:  I was very pleased to be chosen "Top 3" at As You Like It!


I would love to see YOUR creation in our challenge.

Thanks for stopping by!
Karen
Image may contain: one or more people and text

Wednesday, May 8, 2019

WWC220 - Kath's "All About Occasions" Challenge

Happy Wednesday and thank you for stopping by.  It is All About Occasions on the Watercooler Website and Kath is our hostess this week.
Distress Ink:  wilted violet, salty ocean, twisted citron, squeezed lemonade, carved pumpkin

This is the Mother's Day card I made for my mother-in-law.  I embossed the  blooms and leaves from Create a Smile's In Bloom.  I love these large bold flowers!  Then I used distress ink (wilted violet, salty ocean, twisted citron, squeezed lemonade, carved pumpkin) on an ink blender to color each image.  I buffed and let dry. Finally, I fussy cut each image.  I really need to order the die cuts for this much used set.

Next, I stamped a background using SSS's Brush Stroke Messages.  I adhered the flowers and leaves using foam tape for dimension.  Last I popped on the sentiment and added SSS sequins  and Pretty Pink Posh jewels.

I am joining Simon Says Stamp's Wednesday "For a Special Lady" Challenge

Thanks for stopping by!
Karen
Image may contain: text

Saturday, July 14, 2018

Monochromatic Watercolor Bleaching


I saw a technique that I wanted to try called Watercolor Bleaching.   I thought it was very striking so I took a go at it.  I went for monochromatic blues.  First, I white heat embossed a number of floral images and a Thinking of You sentiment.  Next, I (heavily) watercolored the background with several shades of medium and darker blue distress ink.  To "bleach" I wet a paint brush and dabbed the inside of the images.  I wanted a dramatic and intense effect so I wet the areas, blotted with a towel and repeated until I had the look I was going for.  It got lighter after each cycle.
Emboss Resist Technique with  Distress Inks.

I liked that card so I did a similar second card but added some reds and greens.  In the end, I liked the monochromatic blue card the best. 


 I am entering my card in the following challenges:

Just Us Girls Watercolor Background


The Flower Challenge - Monochrome


Cas-ual Fridays Embossing Challenge


Thanks for stopping by!
Karen

Saturday, June 23, 2018

Ink Blending for Summertime


I was in the mood to do some ink blending and this fruit collection (Create a Smile Fruit Salad) was calling to me. This is such a fun summery stamp set and I wanted bright bold colors. 

I started by embossing 5 fruit images and then used distress inks to blend from pink (watermelon) to orange, yellow (lemons and bananas) and ended with green for a nice citrusy lime.  I wanted contrast so I mounted the fruit band on white cardstock then drew two black Sharpie lines to frame the colors.  Lastly, I mounted the card top on a black base.

Ink Blending with Distress Inks

I am entering this card in the following challenges:

TGIF Summer Inspiration Challenge which features a photo of a bright Lemonade Stand for inspiration.  I went with the bright colors and citrus theme.

Addicted to Stamps Make Your Mark Challenge   so make your mark and play along.

Create a Smile Fruit Salad.


Thanks for stopping by!
Karen


New Blog Site

Hello friends.  I just wanted to let you know that I have a new blog site:  Kennyscards.com I'd love for you to pop over and check it ou...