Hello! It is the third Wednesday so we are making masculine cards here at The Watercooler Wednesday Challenge and Helen is our hostess. I made this card for my brother.
Wednesday, January 20, 2021
WWC305 - Helen's Challenge: Anything Masculine Goes
Hello! It is the third Wednesday so we are making masculine cards here at The Watercooler Wednesday Challenge and Helen is our hostess. I made this card for my brother.
Thursday, November 12, 2020
Altenew Academy Level 3 Workshop
Hello! I am so excited to share the final project for my Level 3 Altenew Academy Educator Certification Program. At left I am talking about my samples for the ink-blending card we created.
This has been such a fun journey for me! I started the certification program in May and since then I have taken 25 classes, written 25 blog posts about what I learned and completed a final project for Level 1 and Level 2. The class instructors taught me new techniques and improved the skills I had. I've worked hard, learned a lot and enjoyed every moment!
I invited four good friends over for a morning of card making and it became an "international event" with the on-line attendance of Virginia Lu of Canada and Erum Tasneem of Pakistan. They have been so encouraging and were with me every step of the way.
I started by creating two beginner level card projects to teach to my participants: faux watercolor stamping and ink blending with stencils. I worked on my lesson plan, came up with a timeline and created sample cards which I submitted to Virginia in advance. The day before, I set up the workspace for my class.
Each work station had a silicone mat,
microfiber cloth, blending brush, stamps, stencils, washi tape, A2 card panels, two die cut
sentiments, acrylic blocks, ink, liquid glue, A2 card bases, colored envelops, tags and ribbon.
Wednesday, October 14, 2020
WWC293 - Tristan's Challenge: All About Occasions
Happy Fall Y'all...that's what we say here in Texas. I have the Jane's Doodles Pumpkin Spice stamp set and thought it would be fun to fussy cut three of the pumpkin images and mount them on masked inked squares. This card is up on the Watercooler Wednesday Challenge Website and we would love to see your creation in our gallery.
Jane's Doodles Pumpkin Spice stamp set
Sunday, October 11, 2020
Multi Media Cards With Loads of Gorgeous Texture
- I mixed Zig Cobalt Blue with water and Irridescent Shimmer Spray and then dipped a piece of Bristol cardstock into the colorful puddle. I dried the panel and then repeated.
- I tinted my Embossing Paste with Carved Pumpkin distress ink for a fallish vibe.
- I swiped the embossing paste over my stencil with a palette knife. I wanted a rough look so I didn't cover the entire stencil and I made sure there was a variety of thickness to the paste.
- While the embossing paste was wet, I sprinkled just a bit of Peach Embossing Powder on the paste and then heat set. I love the texture and interest it adds.
- I heat embossed Altenew's Best Mom spray (in brown) and then watercolored and die-cut the image.
- I applied texture paste through the Feathered Leaves Stencil and then heat set.
- Using diluted watercolors mixed with shimmer spray, I loosely colored the background in blue and yellow.
- Using a damp paint brush, I feathered the watercolor edges and then dabbed with a cloth to soften the edges.
- I added blue, yellow and black paint splatters.
- I stamped, watercolored and die cut the Weekend Doodles floral spray.
- I cut an oval from some tulle gift wrapping ribbon and glued to the back of the floral spray and then adhered the combo to the card base.
- I added a simple sentiment embellished with Painted Grid Washi Tape.
Creative Artiste's Mixed Media Challenge I used paint, shimmer spray, embossing paste, embossing powder and of course paper.
The Flower Challenge #49 "Circles" I love the textured circles on this background.
UPDATE: The top card won at The Flower Challenge "Circles" Challenge
Tuesday, October 6, 2020
Quick and Simple Cards
I then pressed the stamp onto Bristol cardstock and let it sit for a few seconds. I also did a panel on watercolor paper, but the detail was lost so on this card, I used the Bristol panel. I really love this vibrant color combination for fall.
I wanted the focus on the background so I kept the other elements black and white. I stamped the darling leaves cluster from The Retro Plantines stamp and die set and then die cut. I added a simple sentiment but added a strip of Painted Grid Washi tape to the top for a little added interest.
Friday, August 28, 2020
Altenew Academy Level 2 Final Project
Hello, hello....so pleased you stopped by! I finished Altenew Academy's Level 2 Classes and wanted to share my final project. I was challenged to make four masculine cards for four different occasions. I had loads of ideas and had a lot of fun creating. To make my cards masculine, I used my husband's favorite colors....aqua, blue and green. Mark probably wears an aqua or blue Columbia fishing shirt five days out of seven...he calls it his uniform! I also used lots of die-cuts because Mark loves those on cards. The unifying elements are handcrafted backgrounds and embossed sentiments on navy cardstock. I've learned so much over the past three months but I decided to spotlight three favorite classes:
- Beyond Basic Backgrounds - We learned to make beautiful backgrounds to enhance our cards.
- Celebration Stencil Techniques - We learned to expand our stenciling repertoire.
- Masking Unleashed - We learned various masking techniques that up the "wow" factor of our cards.
Encouragement Card:
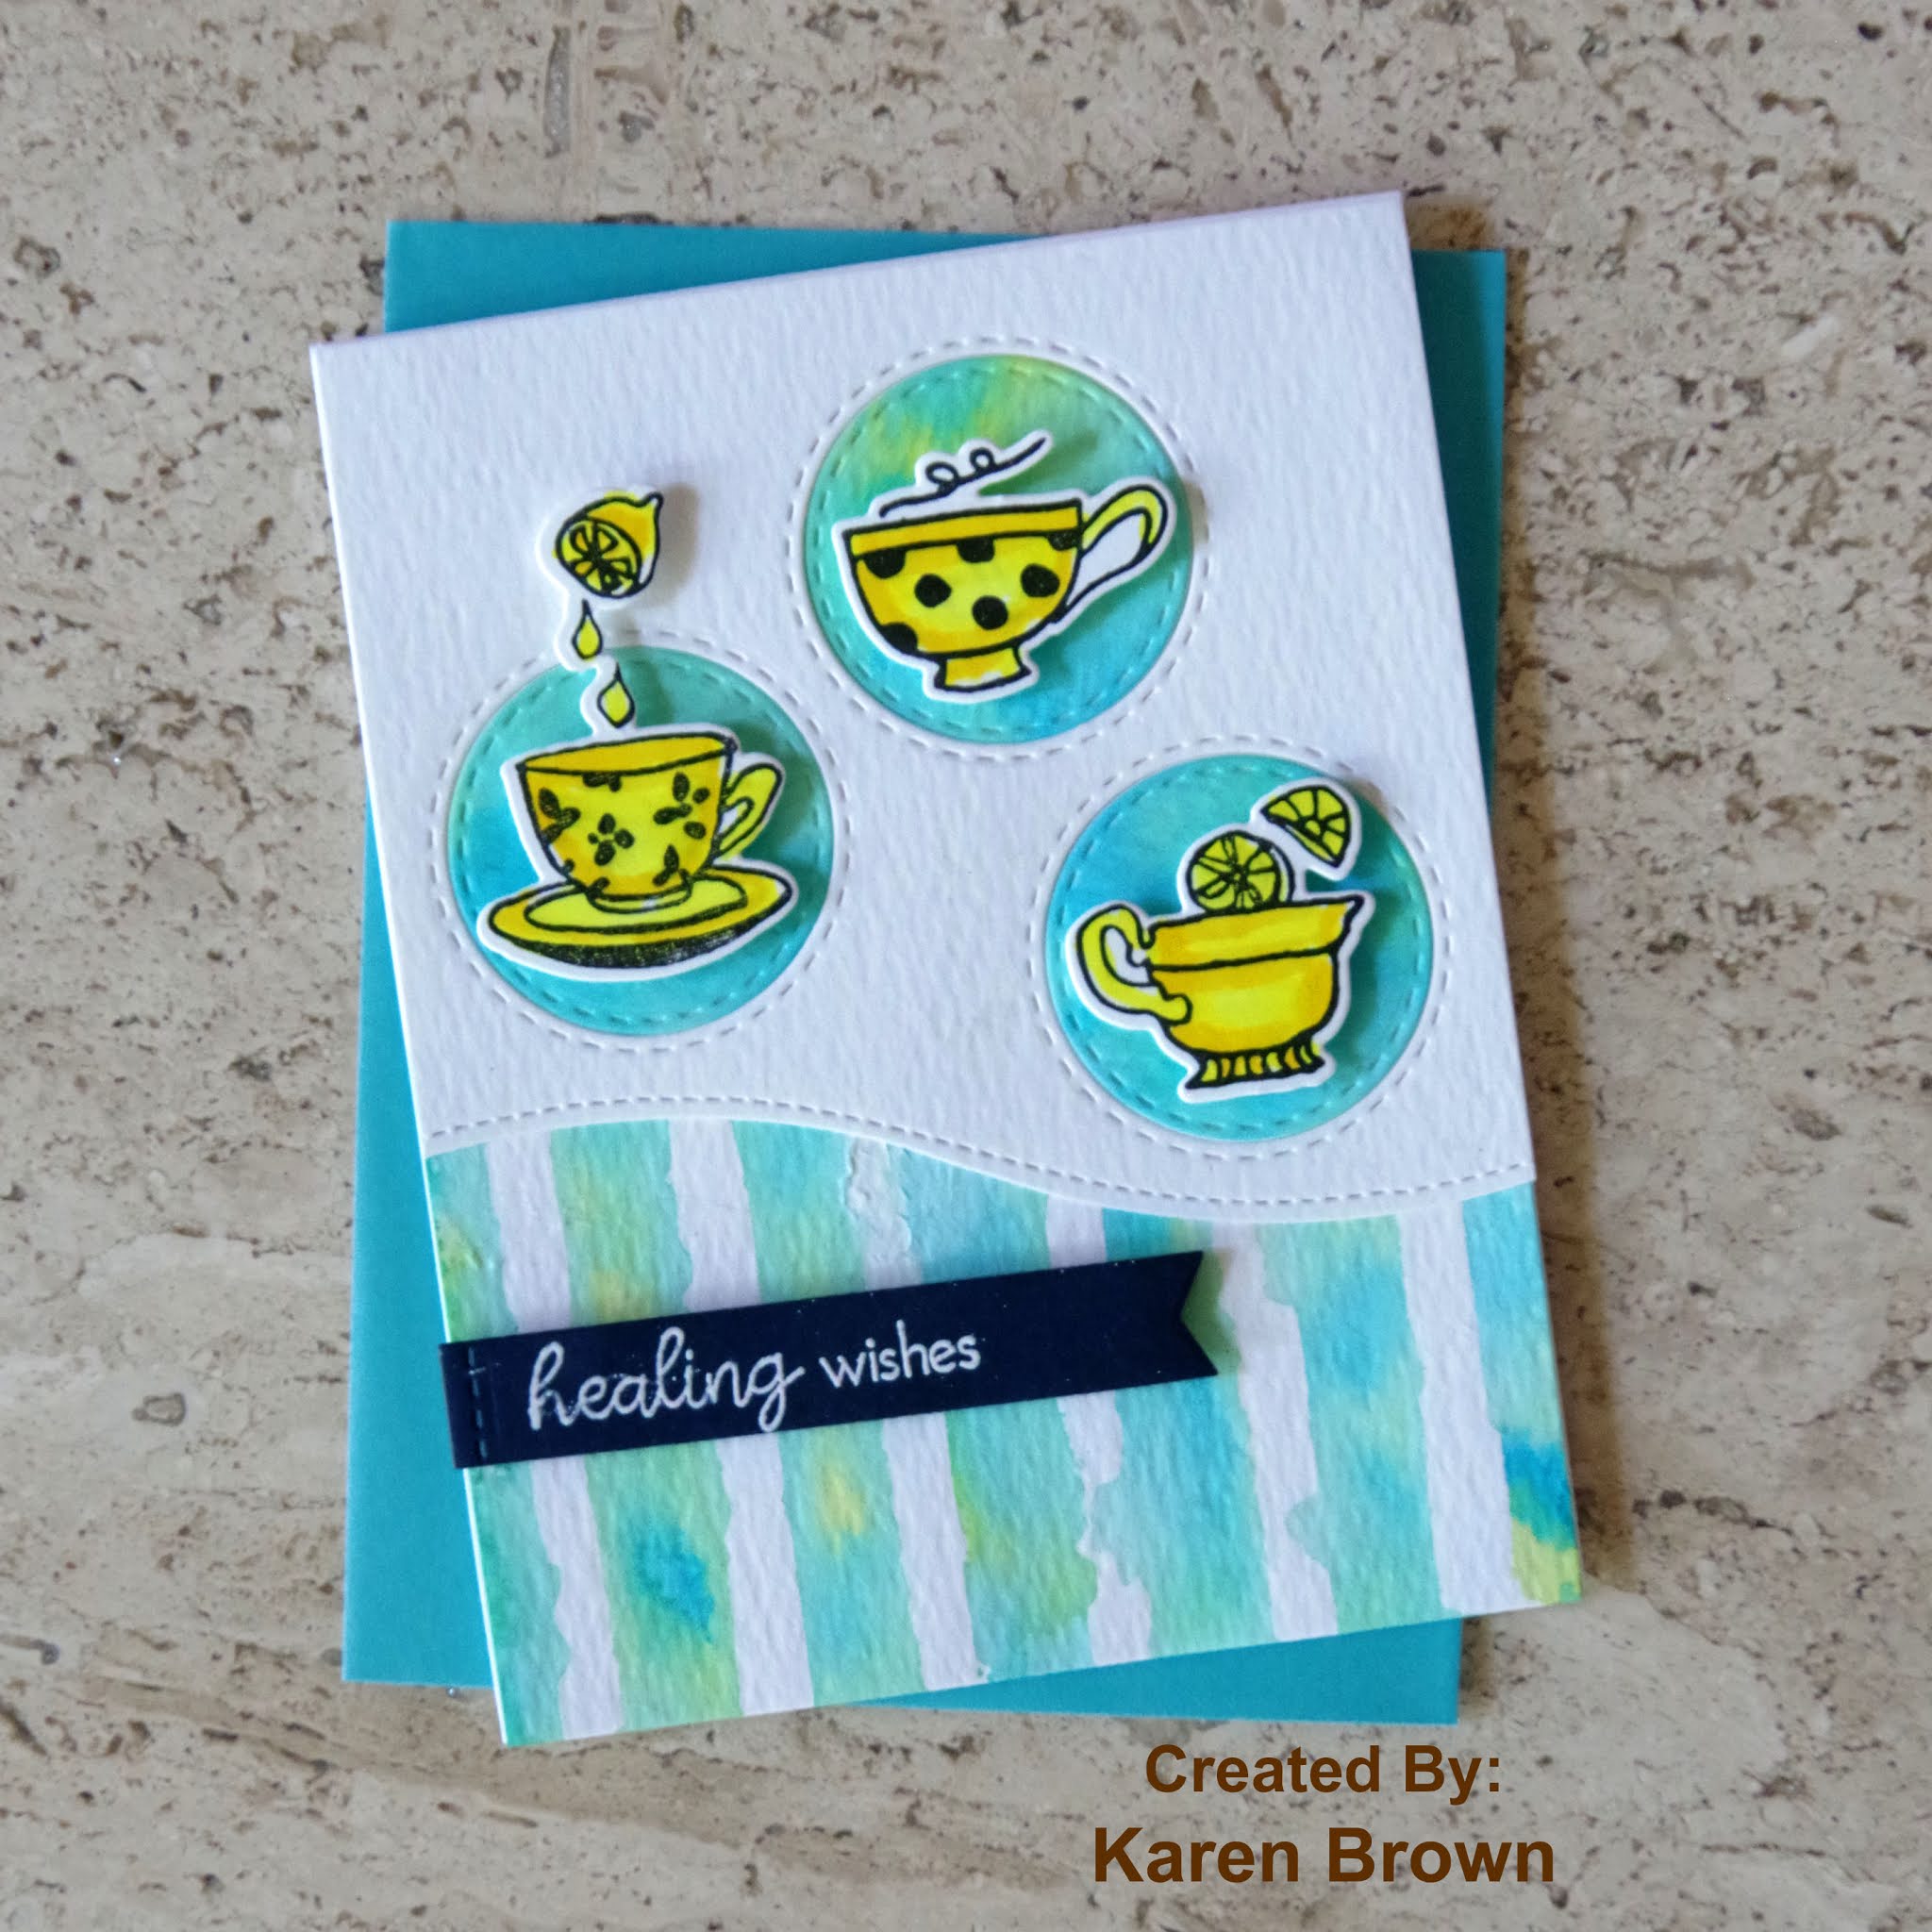
This first card is my husband's favorite of the group. Mark's beverages of choice are coffee and hot tea....he makes a pot of each every day and the color yellow is very encouraging and optimistic (In The Mood For Color). My idea was to make inlaid circle die cuts that coordinated with a hand crafted background. We worked on inlaid die-cutting in Beyond Basic Backgrounds and stencil overlays in Celebration Stencil Techniques.
- I started by taping my Altenew Watercolor Stripes stencil to a watercolor paper panel. I then wet the paper with clean water and then dabbed and pounced three colors of distress ink onto the paper. I LOVE this technique and think it makes a very fun background.
- Next, I took a second watercolor panel and used the wet on wet technique to dab the same three colors of distress ink on the panel. After the paper dried, I die cut three 1 1/2" circles.
- I die-cut a white watercolor paper overlay for the inlaid technique.
- I stamped, Copic colored and die cut three coffee/tea elements from Altenew's Tea Time stamp and die bundle.
- I heat embossed an encouraging sentiment on navy cardstock.
- I assembled the card using liquid glue and foam squares (for the cups and sentiment).
- I started by negative masking three 1 1/4" squares. I then used ink blending brushes to liberally apply ink to the squares.
- I stamped and die cut three images from Altenew's Garden Grow stamp and die bundle. I wanted the colors to be the star so I left the images uncolored. I think this makes for a very eye-catching look.
- I heat embossed a birthday sentiment on blue card stock and then assembled my card.
Love/Thinking of You Card:
- I masked off a large negative mask around my card panel. I blended in a medium blue and then applied a vivid blue around the edges. So pretty and fun to do!
- I stamped, Copic colored and die cut two images from Altenew's Garden Grow stamp and die bundle. This is one of the first stamp sets I purchased and it is still a favorite!
- I heat embossed my sentiment, assembled my card and attached to a top folding A2 card base.
Anniversary Card:
- I Copic colored the wreath with 3 different shades of yellow-green and green.
- I started by taping my Altenew Watercolor Stripes stencil to a watercolor paper panel. I then wet the paper with clean water and then dabbed and pounced four colors of distress ink onto the paper. I told you above that I love this technique!
- I die-cut and assembled the card on a top-folding A2 base.
Upcycled Item:
Finally, we were asked to upcycle or alter an item. I ordered some muslin favor bags for my daughter's wedding and have quite a few left so I thought this would be the basis for my upcycle project. I thought they would be cute "envelops" for cards given in person or fun little gift pouches. A lot of the techniques we learned at Altenew Academy can be applied to non-card projects and I would like to share the processes I used to decorate my muslin bags:
· Stamping on fabric
· Coloring on fabric
· Ink blending on fabric
· Felt die-cuts adhered to fabric
· Stamp layering on fabric
I started by personalizing a little bag for each of the cards that I created above.
For the Color Block Card, I
again masked three squares and then ink blended with the same (distress) inks I
used on the cards. It is interesting that
the colors change a bit on fabric, but the result is a bright fun pouch.
PRO TIP: To keep the felt from stretching and tearing while die cutting, I first glued a piece of regular paper to the back of the felt. I let it dry overnight and did my die-cutting the next day. This makes a huge difference in the quality of the die-cut!
My final idea was to do a
bit of stamp layering on fabric. I used pigment
ink, dried with my heat tool and then moved on to the next color. This card is definitely feminine but I wanted
to try the technique on muslin and all my layering stamps are flowers.
Featured Altenew Products:
Altenew Watercolor Stripes stencil
Altenew Tea Time stamp and die bundle
Altenew Garden Grow stamp and die bundle
Altenew Weekend Doodles stamp and die set
Wednesday, August 19, 2020
WWC285 - Karen's Challenge: Anything Goes with a Masculine Twist
- I started out by inkblending over a stencil to create the background panel.
- I then ink blended another small panel for the circle die-cut inserts. I let both panels dry for a few hours.
- I die cut the decorative wave border and then three circles from a piece of white card stock.
- I then die cut three ink-blended circles from the small panel.
- I stamped, Copic colored and die cut the animals.
- I adhered the white panel to the blue background using foam tape. I also used foam tape to add the colored circle inserts for an inlaid look. I popped on the animals with foam squares and added the sentiment.


Sunday, August 16, 2020
Altenew Academy - Masking Unleashed
- I trimmed a piece of masking paper to 4 1/4” x 5 1/2”, taped the die in the center and then ran it through my die cutting machine. I then carefully adhered it to a Bristol Cardstock panel.
- Next, I lightly blended four shades of Distress Ink from the bottom to the top.
- I taped the stencil at an angle over the “T” and blended 5 shades over the stencil using a much heavier hand. I carefully peeled back the masking paper, trimmed the panel down, attached some craft foam to the back and added it to a top folding A2 panel.
- I die cut a sentiment from navy Cardstock and glued it to the panel. I also added three enamel dots in coordinating colors.

Wednesday, July 1, 2020
WWC278 - Michelle's Challenge: Anything Goes with a Feminine Twist

New Blog Site
Hello friends. I just wanted to let you know that I have a new blog site: Kennyscards.com I'd love for you to pop over and check it ou...
-
Happy Birthday Altenew! I am honored to be celebrating this day along with such a talented group of designers and sponsors. Die Cutting F...
-
Altenew 3D Embossing Folders Hello and thanks for hopping! I am so excited to be participing in Altenew's new release of 3D Embossin...